

Explore Knowledge Articles
Back
Pairing Serena Shades Quick Start Guide
Pairing Serena Shades Quick Start Guide
I want to pair my Serena Shade to a…
Adding Serena Shades to Caséta
Install the Caseta Smart Hub
1. Connect the smart hub to your Wi-Fi router using the Ethernet cable.
2. Connect the power cord to the smart hub and plug it into an outlet.
Download the Lutron App and walk through setup
Adding Serena Shades to Caseta
- Make sure your Serena Shades are set up and installed. They should not be added to a system until they are fully installed to avoid any accidental damage.
- Open your Lutron App
- At the top left, click the settings button and select, "Add Device."
- From the Device menu, click the device icon for adding a Shade
- The App will then guide you on what button on the shade you will need to press and hold for 10 seconds until the app finds the shade.
Once the shade is found, follow the steps in the app to name the shade and finish the pairing process.
Adjusting Limits
- Open your Lutron App, and tap on the shade icon
- Tap on “Edit Device” in the pop-up box
- Tap on “Set Shade Limits” under the Edit Device page
- Pick which limit to adjust
- Use the arrow buttons to position the shade and tap “Save” in the upper right corner of the screen
Adding a Pico remote to the app
- Tap on the Settings icon in the top left corner of the Lutron app.
- Select Add Device from the Settings list.
- Tap on Pico Remote.
- Choose the image that matches your Pico remote.
- Press and hold the bottom button on the Pico for at least 10 seconds until the LED indicator light starts blinking on the remote.
- Choose the Room the Pico will be located and tap Next in the top right corner.
- Choose whether this Pico remote will be controlling lights or shades and tap Next.
- Tap I am done adding devices.
- Once the system finishes programming (this may take a few minutes) test the Pico remote.
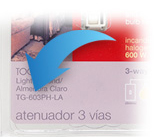
Defaulting Shades
Note: If you are having trouble adding the Shade to the system, we recommend defaulting the shade to factory settings and starting over. This will not affect limits. To accomplish this,
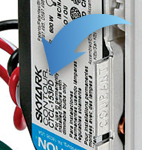
- Find the single button on the shade
- Press the button 3-times, holding the button on the third press
- After holding for 6 seconds, the LED (the button you are holding) will start to flash rapidly
- Push rapidly 3-more times then release, if successful, the LED should flash red/green multiple times confirming the shade has defaulted
- Note: If the LED does not flash red/green multiple times, you will need to start over from step 1
- Repeat the steps in the Adding Serena Shades to Caséta section.
Programming Shades Without A System
1. Assigning a Pico Remote
Step 1: Tap the shade button on all shades you want assigned to the control. The shade button will illuminate solid green and stay green.
Note: If the Indicator Light turns off when the shade button is released, you will need to factory default the shade. See Defaulting Shades section.
Step 2: Hold the Close button on the Pico remote for about 10 seconds, until the shade button blinks and turns off.
2. Adjusting Shade Close Limits
Note: Shade must be assigned to control.
Step 1: Tap the shade button on the shade you
want to adjust. The shade button illuminates green.
Step 2: Hold the Open and Raise buttons
simultaneously on the Pico for about 10 seconds,
until the shade button blinks and remains lit.
Step 3: Use the control’s Raise and Lower buttons
to adjust the shade position to the lower limit you prefer.
Step 4: Hold the Close button on the Pico for about
10 seconds, until the shade button blinks and turns off
3. Adjusting Shade Open Limits
Note: Shade must be assigned to control.
Step 1: Tap the shade button on the shade you
want to adjust. The shade button illuminates green.
Step 2: Hold the Open and Raise buttons
simultaneously on the Pico for about 10 seconds,
until the shade button blinks and remains lit.
Step 3: Use the control’s Raise and Lower buttons
to adjust the shade position to the lower limit you prefer.
Step 4: Hold the Close button on the Pico for about
10 seconds, until the shade button blinks and turns off
Defaulting Shades
Note: If you are having trouble pairing the Shade to a Pico remote, we recommend defaulting the shade to factory settings and starting over. This will not affect limits. To accomplish this,
- Find the single button on the shade
- Press the button 3-times, holding the button on the third press
- After holding for 6 seconds, the LED (the button you are holding) will start to flash rapidly
- Push rapidly 3-more times then release, if successful, the LED should flash red/green multiple times confirming the shade has defaulted
- Note: If the LED does not flash red/green multiple times, you will need to start over from step 1
- Repeat the steps in the Assigning a Pico Remote section.
Was this article helpful?
Thank you! We appreciate your feedback!