

Explore Knowledge Articles
Back
Wire Your Sivoia QS / Palladiom Wireless Shade for Power
Please note: If a Sivoia QS / Palladiom shade is hardwired for power only, a Wireless Receiver (QSYC-J-RCVR) must be used to communicate with the shade.
Article Contents:
- Confirm that you have a Lutron Sivoia QS or Palladiom Wireless shade by identifying the button style and wireless receiver shown below.
- Verify the Sivoia QS or Palladiom shade has a Wireless Receiver.
- Wiring the Power Supply
- Wire the Shade
- Related Articles
Step 1: Confirm that you have a Lutron Sivoia QS or Palladiom Wireless shade by identifying the button style and wireless receiver shown below.
The Sivoia QS and Palladiom drives have 4 buttons separated in the middle by an LED Indicator Light. A small, pointed object such as a stylus is required to press any of these four buttons.
1. A QS Drive has one black rectangular button and one white rectangular button on one side of the Indicator Light. On the other side of the indicator light is a counterclockwise arrow button and a clockwise arrow button
2. A Palladiom Drive has one square button and one round button on one side of the Indicator Light. On the other side of the indicator light is an arrow up button and an arrow down button. These buttons are accessed by rotating the finish ring on the drive end of the shade.
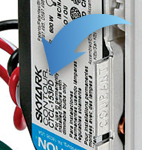
Step 2: Verify the Sivoia QS or Palladiom shade has a Wireless Receiver.
A wireless receiver (shown below) is required for wireless communication to a remote control. The wireless receiver may be located near the shade drive or mounted remotely anywhere between the shade and the power panel.
QS drives usually have a wireless receiver mounted near the shade.
Palladiom shades are more likely to have the wireless receiver mounted in a remote location by using the Wireless Receiver Adapter (shown below) which is included with all Palladiom Wireless shades.
If no Wireless Receiver is present, the shade cannot be controlled with a wireless control. A QSM may be used as an alternative to connect a wireless remote. Otherwise, a Wireless Receiver can be purchased and installed.
The Sivoia QS drive will have 4 buttons on the drive. There will be an indicator light located in the middle. A stylus is needed to press any of these four buttons.
Step 3: Wiring the Power Supply
10-Output Panels:
- QSPS-10PNL - Sivoia QS Smart Panel Power Supply (lutron.com)
- QSPSY-10PNL - Sivoia QS Smart Panel Power Supply (lutron.com)
Run choice of 2-conductor to Pin 1 (COM) and Pin 2 (V+) of the panel. NOTE: for QSPS-10PNL do not connect Pin 3 (MUX) and Pin 4 (MUX BAR) if controlling wirelessly.
Individual Plug-In Power Supply:
- QSPS-P1-1-35V - QS Link Plug-In Power Supply (lutron.com)
- QSPS-J-1-35V - Junction Box Power Supply; QSPS-J-1-35V (lutron.com)
Connect the power wire (RED) to 35 V terminal and common wire (BLACK) to COM terminal.
- Wire 4-pin terminal block (provided) to cable using the included screwdriver. Tighten screws securely on the exposed wire. Leave 1/16 in (2 mm) of exposed copper to ensure insulation is not pinched.
-
Plug a 4-pin terminal block on the cable to the shade or drape the drive terminal block.
-
Plug in the wireless receiver to the shade or drape drive.
For more information on wiring a shade for wired communication, please see our Wiring a Sivoia QS or Palladiom Shade for Power and Communication Article.
Was this article helpful?
Thank you! We appreciate your feedback!